
To find an End City, enter your seed value into our interactive End City Finder and choose your Minecraft edition. The interactive map displays the exact coordinates of every End City and floating vessel directly in your browser.
Entering Your Seed and Loading Worlds
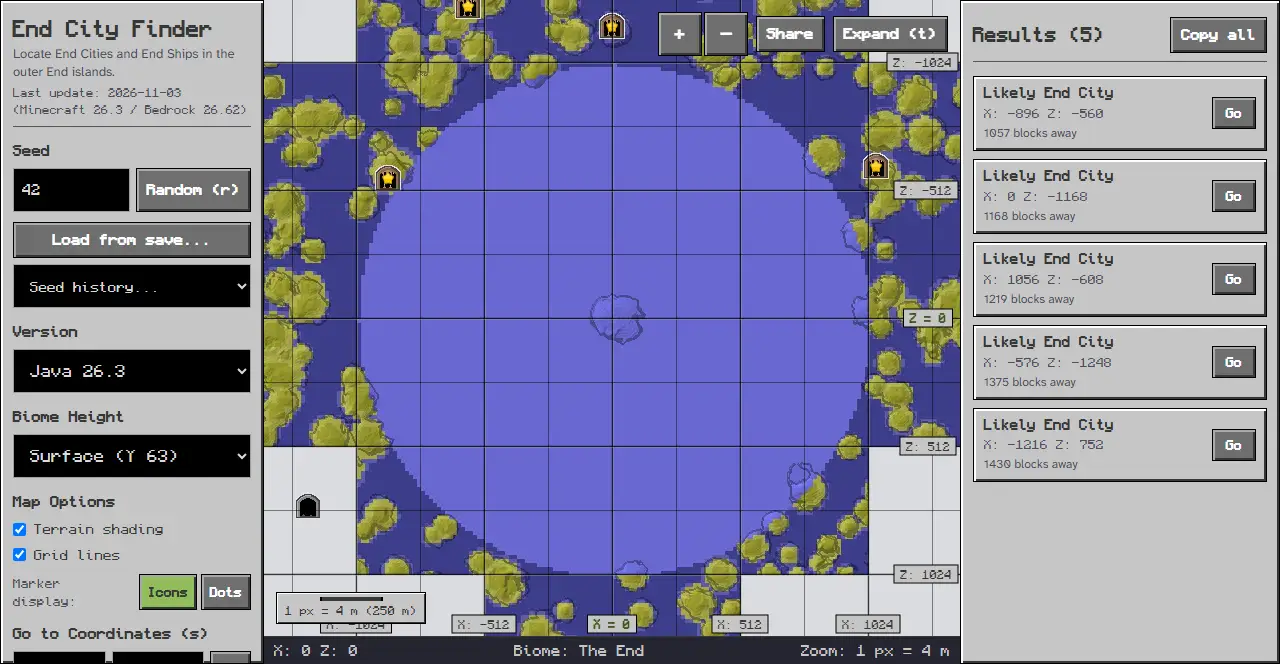
Open the End City Finder tool to begin your search. On desktop screens, controls reside in the panel on the left, while on mobile screens, the map appears at the top and controls are in the bottom sheet accessed by tapping the “Options” tab.
- Locate the Seed input field in the left rail with the “Seed or text” placeholder.
- Type or paste your world seed value into the field.
- Click the “Random (r)” button to roll a new seed.
- Open the “Seed history…” selector to reload previously viewed seeds.
- Click the “Load from save…” button to read your level.dat file directly.
Selecting Your Game Edition and Dimension
Select your game release in the left rail to display matching coordinates. Within 1024 blocks of the center of the End, every spot is the main island’s The End biome. End cities generate only in the end highlands and end midlands biomes.
- Open the Version menu in the panel on the left.
- Select your exact release under either the Java Edition or Bedrock Edition group.
- The tool automatically sets the active realm to The End for outer island inspection.
Filtering End Ships and Exploration Features
The End City Finder lets you filter which settlement structures appear across the outer void. End city spots are chosen on a grid of 20 chunks, with at least 11 chunks kept between neighbours. An End ship holds an elytra in an item frame.
- Locate the Features section in the left rail.
- Click the “All” button to display all discovered settlements.
- Click the “None” button to clear active markers from the map.
- Toggle the “With End Ship” checkbox to highlight settlements that include an aerial vessel.
- Toggle the “Without End Ship” checkbox to display or hide towers without ships.
- Under Map Options, toggle checkboxes for “Terrain shading” and “Grid lines” to adjust map rendering.
Navigating the Map and Coordinate Search
Once your seed is configured, you can explore the outer island terrain smoothly.
- Enter target positions into the “Go to Coordinates (s)” X and Z input fields in the left rail, then click the “Go” button.
- Use the ”+” and ”-” zoom buttons to adjust your magnification level.
- Click “Expand (t)” to view the map in fullscreen mode.
- Click the “Share” button to copy a direct link to your current map view.
Reading Status Bar Data and Results
The tool provides coordinate feedback as you inspect the void terrain.
- Move your cursor across the map to view X and Z positions in the bottom status bar.
- Inspect the Biome indicator in the status bar to check island territory.
- Check the Zoom indicator to understand current pixel distance scaling.
- Click any settlement icon on the map to view its exact center position.
- On desktop displays, view the Results panel on the right, or tap the “Results” tab on mobile screens to inspect a sorted table showing coordinates and distance.
Troubleshooting Common Finder Issues
If you run into issues while locating outer settlements, check these common items:
- Empty Seed field: Ensure you typed a valid numerical seed or string before searching.
- Edition mismatch: If structures do not match your world, check whether Java Edition or Bedrock Edition is active.
- Target outside view: If no structures appear nearby, use the “Go to Coordinates (s)” feature or zoom out to inspect distant outer islands.
Related Exploration Guides
When planning an expedition into the void, consult our technical guides:
Use the End City Finder whenever you need reliable outer island coordinates.
Sources
Tool interface and controls inspected on chunkbase.dev.